Installation
This script is written by Brian Chan,
and Alexander Kozik,
at R.Michelmore lab.
Contig Viewer is under GNU License.
Copyright, UCD, Alexander Kozik.
First we have to have Python installed already. For more info on how to install Python, please go to www.python.org.
The Contig Viewer can be downloaded here (Py_ContigViewer_Mar_25_2004.py)
We can run this script by either double clicking it (Windows),
or to call it at
the command prompt with "python scriptName.py" (Linux/UNIX).
On Mac OS X run it in
command prompt "pythonw scriptName.py"
New experimental version of Contig Viewer
Py_ContigViewer_Apr_19_2004.py provides transparent data transfer to
PerlPrimer program
via network socket. It simplifies oligo design because there is no need anymore to
run "save as" - "open as" dialogs. Additional feature of this new version is
configuration of display parameters using "Config file". Example config files:
ConfigTomato.txt
ConfigLettuce.txt
Example input files (multiple genotypes in the tomato EST assembly):
L_ABC_Contig154.aln
L_ABC_Contig2491.aln
L_ABC_Contig2859.aln
L_ABC_Contig2942.aln
L_ABC_Contig964.aln
(input files are a modified CAP3 alignments, derived from
DIS pipeline, see step#10)
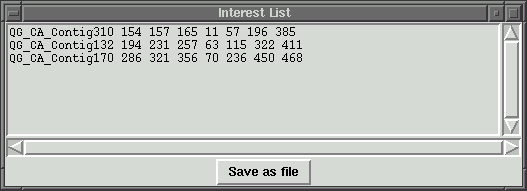
Graphical output for files above you can view here:
L_ABC_Contig154.png
L_ABC_Contig2491.png
L_ABC_Contig2859.png
L_ABC_Contig2942.png
Example input files for Arabidopsis EST assembly represented by one genotype can be found here
Program Operation
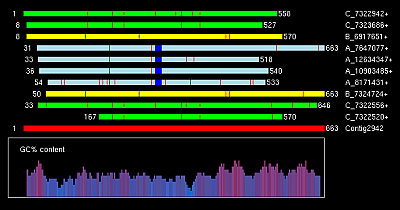
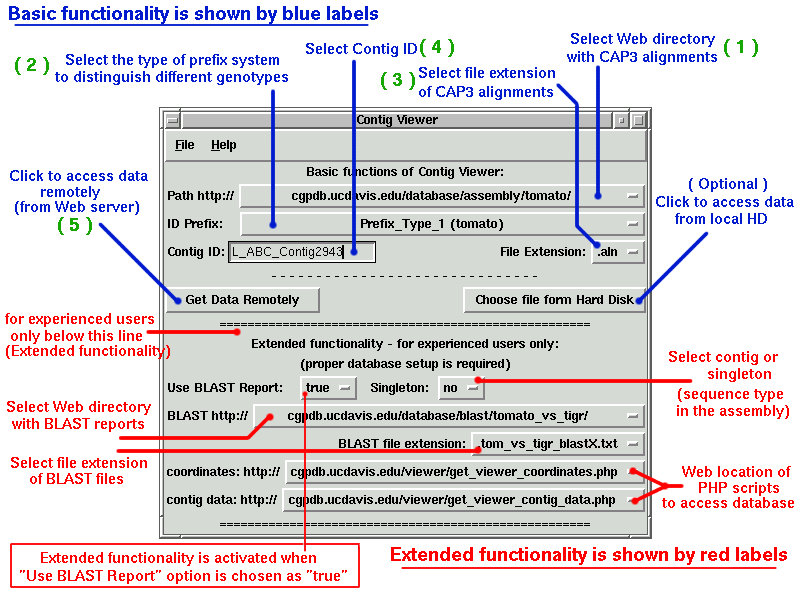
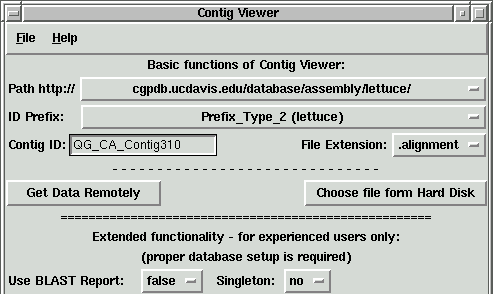
This is the first window we see. "Path" by default points to the tomato data, change it to the lettuce or sunflower path if the contig is from lettuce or sunflower.
There are two ways to retrieve data for this program. One is to retrieve
locally, the other one is to retrieve remotely. In this example, we will
show you how to retrieve data remotely.
Try to view the lettuce contig "QG_CA_Contig310".
1. Change the Path to "cgpdb.ucdavis.edu/database/assembly/lettuce/"
2. Select Prefix_Type_2 (lettuce)
3. Change file extension to ".alignment"
4. Enter in the Contig ID window "QG_CA_Contig310"
5. Hit "Enter" or press "Get Data Remotely" button
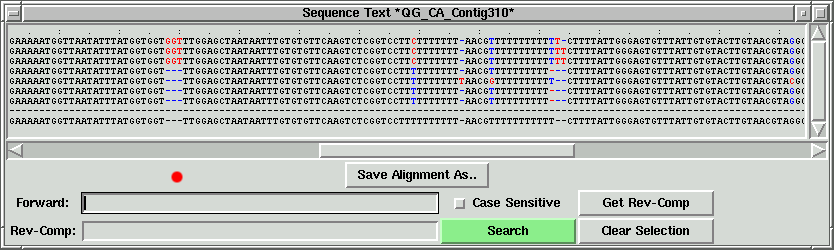
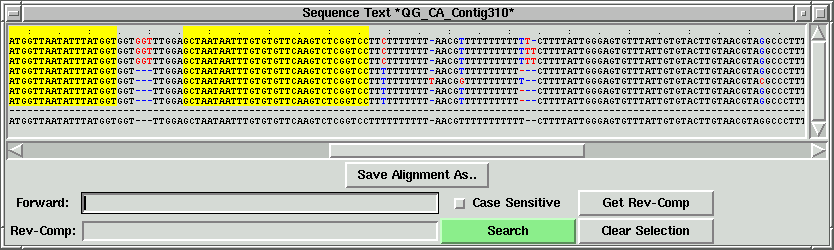
Two new windows should pop up. One is the contig image, the other one is
the contig text info.

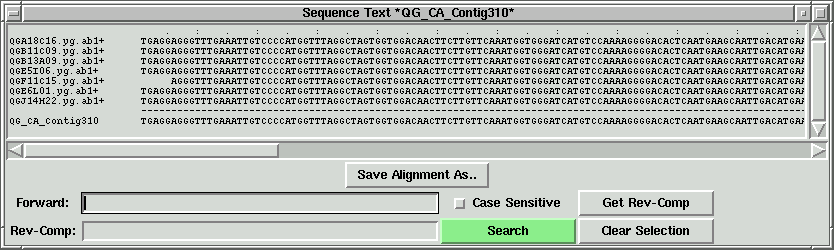
In the contig text info window, we can scroll left to right, and up to down
to see all the sequences. If we press the "Save Alignment As" button, we can save
the alignment into a contig file, which can become a local contig input file.
Semi-automated PCR oligo design:
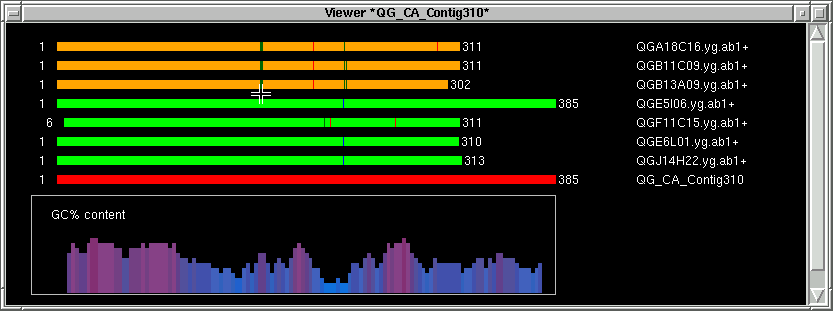
Pressing any mouse button on the contig image will pop up this index window.

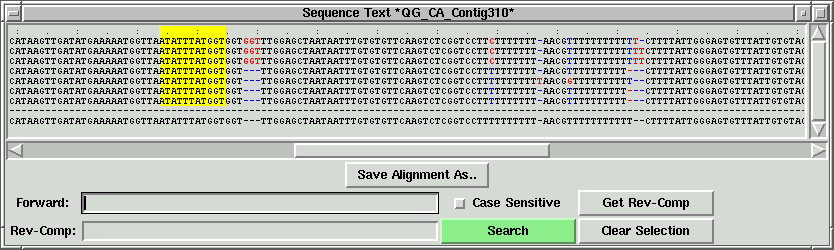
To identify the target between the primers, press the middle mouse button or hold the CONTROL key and press the
left mouse button. This will define the middle index (M).
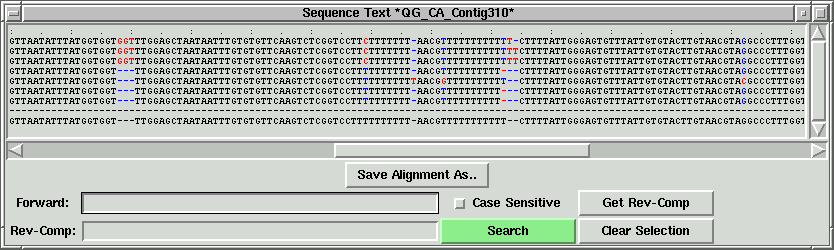
In the contig text info window, the corresponding part will be shown. In this
case, "GGT" corresponding to the green lines, and the left part of "GGT" is shown.

Next we define the area where the forward primer will be chosen from.
Press with our left mouse button next to the green thick lines.

Pressing the left mouse button fills in the left index (L) with the actual base position on the contig

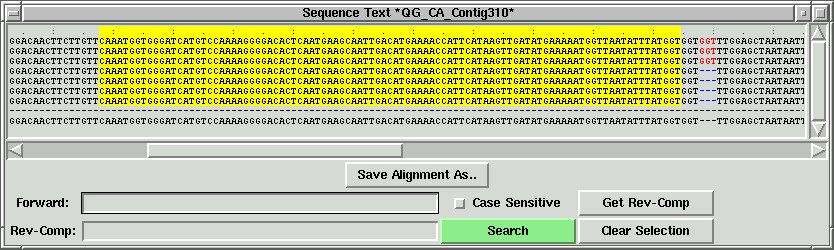
Now we move a little bit to the left of the left index (L). Hold the SHIFT key
and press the left mouse button. We are now defining the left exclude index (LX),
which with the left index (L) we picked defines the block that the forward oligo
will be chosen from.

There is a default minimum size (30) for the oligo block. If the oligo block size is
less than that, then a yellow border box will appear instead of a
white border box. The corresponding sequence will be highlighted in the contig text
info window. Also, the left exclude index (LX) will be filled in.


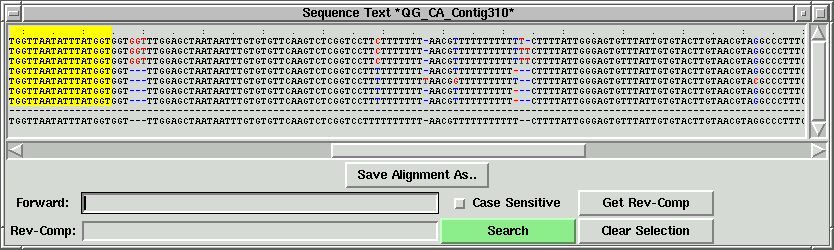
Now let's move a little bit to the left of where we were and pick the left
exclude index (LX) again by holding the SHIFT key and pressing the left mouse
button.

The white border box should come up and the yellow border box will disappear,
meaning the oligo area is big enough. Notice, this yellow border box only serve
as a reminder, it's totally valid to have a small oligo block.


Now right click on the other side of the green lines to set the right index
(R).


Move the mouse a little bit to the right of the right index (R). Hold the SHIFT
key and press the right mouse button to define the right exclude index (RX).


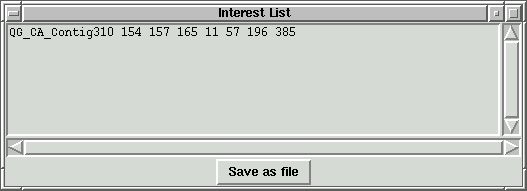
In the contig index window, pressing "Add to List" button will add the indexes
and sequence info to the interest list. A window with the name "Interest List"
should pop up if it doesn't exist already.

This program can open many contigs at once. We can store different contig indexes
to the interest list. Pressing "Save as file" will save the interest list to
a file with file name specified by the user.